Wednesday, January 16, 2013

Beauty From The Inside Out


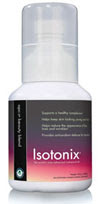
I recently have fallen head over heels in love with a new beauty product, the Isotonix OPC-3 Beauty Blend!
I know, I know, what in the world is that? Its amazingness in a bottle that's what!!! And I swear i'm not just saying that because I sell it...it's truly amazing!

When I first started with Motives, everyone was telling me about this product, and I admit, I was skeptical.
They would say: "Take OPC-3 it will clear up your skin," or "Take OPC-3 you'll feel better and have more energy." Okay I thought...no way. Nothing clears up my acne...I just have bad genes, and the only thing that is going to give me energy is Mountain Dew (Yes, ok I'll admit it I am a recovering addict from Mt.Dew. I'm getting through it now thanks to my amazing brother and sister who got me a Soda Stream for Christmas :D).

So I said I would buy a bottle, see how it works just to say I tried it...not expecting anything really, and now I don't know how I would live my life without it! I know it sounds corny...but when you fall in love with a product, you get kinda corny ;). My skin looks amazing, my hair looks healthier and is growing faster, my nails aren't breaking like they used to and they are finally growing, I am more energetic in the mornings, and i've noticed its been easier to loose weight now. That's a big statement for only taking a product for a month. I used to take hair, skin and nail vitamins from Walmart, but I'm happy to say they are now in the garbage!

So what is Isotonix? I like to explain Isotonix as a liquid vitamin. Basically, Isotonix are supplements that come in a powder form that you mix with water for better absorption.  The products are formulated with the proper balance of fructose, d-glucose, citric acid, potassium bicarbonate and other key ingredients to assure that they are isotonic when properly prepared. Normally, when you ingest a daily vitamin or nutritional supplement tablet, your body must work for up to four hours digesting and absorbing the vitamins and nutrients. During this lengthy breakdown process, a percentage of the nutritive value is lost. But because Isotonix products are powders, none of the fillers, binders, coatings and lubricants that are common to tablet manufacturing are necessary. There are no gelatin capsules or fillers. As a result, the amount of time and work necessary to absorb a supplement is greatly decreased.


Isotonix OPC-3 Beauty Blend is made from a combination of bilberry, grape seed, red wine, pine bark extracts and citrus extract bioflavonoids, all found to be powerful antioxidants. Oligomeric proanthocyanidins (OPCs) are bioflavonoids (complex organic plant compounds) found in fruits, vegetables and certain tree barks that provide exceptional nutritional benefits to the human body. Studies have shown OPCs to be up to 20 times more powerful than vitamin C and 50 times more powerful than vitamin E in neutralizing free radicals. Which means you age more gracefully :) 


So if the paragraph above made no sense to you whatsoever...here's why you'll love it:

  • Supports a healthy complexion
  • Supports a smooth, soft and even-toned complexion
  • Promotes healthy functioning of the skin at the cellular level, which results in healthy, vibrant-looking skin
  • Replenishes essential vitamins and minerals that are co-factors for many enzyme reactions in vivo to help the entire skin to grow and cells to divide
  • Helps maintain normal cell growth
  • Supports healthy skin with key micronutrients to replenish and rejuvenate skin to look, feel and function its absolute best
  • Supports healthy joints
  • Supports healthy skin elasticity to keep skin looking young and firm 
  • Helps maintain healthy collagen production
  • Helps maintain skin elasticity and moisture
  • Helps maintain healthy connective tissue
  • Maintains healthy collagen and elastin levels to help preserve the elasticity of skin
  • Plays a role in maintaining elasticity of capillaries in the dermis, which helps maintain healthy blood flow, minimizing the appearance of spider veins in the skin
  • Hyaluronic acid helps maintain healthy joint flexibility, especially in knees, by moisturizing joints
  • Helps maintain skin moisture
  • Helps maintain an optimal moisture balance in skin that can minimize the appearance of fine lines, wrinkles and pits
  • Promotes healing of minor skin injuries
  • Promotes healing of cuts and abrasions
  • Helps support the skin’s natural defenses from harmful environmental pollutants and chemicals
  • Powerful free-radical scavenger
  • Supports the immune system – a healthy body means healthy-looking skin
  • Promotes a healthy circulatory system including healthy capillaries, which ensures your whole body gets the nutrients it needs to stay healthy
  • Provides antioxidant protection for the entire body – minimizes the damage that free radicals can wreak on your body
  • Helps promote overall health
  • Helps skin stay younger looking
  • Helps maintain healthy hair and nails – biotin
  • Helps support healthy bones, teeth, joints and skin
  • Helps maintain normal muscle and nerve function, supports a healthy immune system, supports a healthy cardiovascular system and keeps bones strong
  • Adequate calcium and vitamin D throughout life, as part of a well-balanced diet, may reduce the risk of osteoporosis
  • Adequate calcium and vitamin D as part of a healthful diet, along with physical activity, may reduce the risk of osteoporosis in later life


Too good to be true? That's what I thought too. This product has made me feel so good on the inside, my husband looks at me like I'm crazy because I always say, "I can just feel that its good for me." I think I finally have him convinced that he should take it to. I may have to force him to take it....but hey the wife always knows whats best right? 

Remember, your makeup only looks as good as the skin underneath. With proper skincare, and healthy youthful looking skin you will notice your makeup not only looks way better, but you will use less product and in the long run save yourself some money! 


Wednesday, January 2, 2013

New Years Makeup Trend


The Trend:

*Flawless Matte Foundation
*Neutral Cheeks
*Smokey Eye Shadow with Glitter
*Thick, Long, Lashes
*Luscious Red Lips


Flawless Matte Foundation:
1.     Start by prepping your face with your favorite skincare regimen. This removes dirt, oil and dead skin from the surface, creating a smooth surface in which to apply your make-up.

2.     If needed, apply a concealer under the eyes, using your ring finger to apply so you don’t break the blood vessels.

3.      Using the Full Coverage Photo Finish Powder ($24.50), apply with a sponge or powder brush to cover entire face. This powder is designed to be worn as a foundation so it provides plenty of coverage.

·         Ever notice your face looks really white in pictures? This is because the SPF in your foundation is causing the light from the flash to reflect, therefore making your face look whiter than it should. To prevent this, try using the Full Coverage Photo Finish Powder to never have a white face in pictures again!


4.       Layer powder until desired look is achieved. Use more layers for more coverage and a matte finish, or use fewer layers for a more natural look and feel.

5.       Set powder foundation with 10 Years Younger Setting Spray $29.95 to keep your makeup looking fresh.


Neutral Cheeks

1.      First choose a neutral colored powder blush that is complimentary to your skin tone. I like Motives Pressed Blush in Lust $14.00. The neutral tone gives you a subtle color that makes you look naturally flushed.


2.      Determine your face shape from the chart below. This will show you where on your cheeks to apply you blush to flatter your face the most.


·         Square-shaped - Apply blush on the apples of the cheeks, then sweep the color straight out towards your temples.
·         Oval-shaped - Apply blush onto the apples of your cheeks and blend, and then apply down the bridge of your nose.
·         Rectangular-shaped - Apply blush on cheekbones below the outer corners of the eyes and blend well. Next, sweep your blush across the middle of your forehead.
·         Triangular-shaped - Apply blush on top of your chin, and on apple of cheeks up to the temple.
·         Round-shaped – Apply blush around your eye area on your temples, creating a “C” pattern. Then apply in the hollow area just below your cheek bone.


3.      For the most accurate results, apply with the Cheek Contour Brush $10.95


Smokey Eyes with Glitter


Start by using a black or grey eye shadow and apply on the lid of the eye using the Detailing Brush $9.95.


Next, use the Eye Blender Brush $9.95 to soften the shadow, and blend upwards into the crease of your eye lid.


Use Kohl Eyeliner in Onyx $14.75 to line your upper and lower water line.


Then use the Angled Eyeliner Brush $14.00 and the same black eye shadow, smudge your eyeliner to create a soft, smoky look.


Using a clean eye shadow brush, apply a neutral colored shimmer shadow to the inner corner of your eye, and extend to the opposite end of the eye.


Lastly, dust a light layer of Gem Dust in Sterling$14.00 over the lower part of your eye lid. 


Thick Long Lashes

1.      Brush through your eyelashes using the opposite end of the Brow GroomerBrush to separate lashes.


2.      Optional: Curl your lashes with the Eyelash Curler $9.95 to lift and curl your lashes, and open the eyes.


3.      Apply Lash Primer $15.95 to dramatize, volumize and lengthen your lashes. This creates a barrier around your lashes, and makes them appear thicker and fuller. Wait for the product to dry completely before you apply your mascara, or your mascara will look grey.

4.      Starting at the base of your lashes, apply Lustrafy Mascara in Blackout $16.95 wiggling the wand from the base of your lashes all the way to the top. Repeat this step 3 times, or until you achieve your desired thickness.


·         If your lashes still aren’t long or thick enough, try False Lashes $6.95 for instant drama!


Luscious Red Lips

1.       Like you do with your face, you also need to prep your lips before applying a bold color like red. Use a lip primer like Lip Lock $12.50 for instant hydration and longer lasting color.


2.       Next, determine what shade of red best compliments your skin tone.

*Olive Skin Tones: Orange Based Reds       *Cool Skin Tones- Blue Based Reds  
*Neutral Skin Tones: Blue Based Reds        *Warm Skin Tones- Pink Based Reds


3.       Line your lips with a Lip Crayon $14.00 similar in shade to your chosen lipstick color to define the shape of your lips, and to prevent your lipstick from bleeding. Use the chart to apply your lip liner without messing up your line.


4.      Using a Lip Brush $9.95, apply your red lipstick, staying inside the line you created with your lip liner. Then blot your lips with a tissue to remove excess product.

·         Optional: Put a gold shimmer gloss over your red lips to create shine and a gold tone to your red lips for the holidays! Try MineralLip Shine in Glam $16.50


Good luck creating the trend on yourself for special occasions, parties, or a night out on the town! This look is a classic, and so easy you cant go wrong!


Wednesday, December 12, 2012

The Basic Face


Last weekend, I hosted a Make-Up Class at J'adore Fason Salon in Cary NC called The Basic Face. This class taught women the 4 Steps to Completing a Face, using Motives Cosmetics.


I had never taught a class before, just usually worked one on one with clients giving them advice and help with their makeup application. So this was a new thing for me and I was excited to take on the challenge!
I am pleased to say that the class was a success! We had about 15 guests show up, and a lot of people were interested in booking an appointment, and said they learned a lot of information!


I decided that since you couldn't make it, I would share with you some of the notes I handed out during the class.
Enjoy!


            THE BASIC FACE
           4 Steps to Completing a Face
Step 1:   Prep, Prime and Base

Prep: Prepping the skin prior to makeup application isn’t just nice to do, it’s a requirement. Your makeup can only look as good as the skin underneath!  Be sure to wash your face twice daily. Washing your face includes 4 steps- Cleanse, Tone, Treat, and Moisturize.  It is important to remove your makeup every night before going to sleep, and every morning before you reapply your makeup. 

Prime: Using a primer is something that most women don’t use when they should be! A primer acts as a barrier between your skin and your foundation, creating a long-lasting natural look. The primer fills in fine lines, wrinkles, large pores, and uneven skin textures. This creates a smooth canvas for makeup to go over.  A little goes a long way! Use a foundation brush to apply. 
                   
  Motives Perfecting Face Primer $19.95


Base:  This step is what most women have difficulty understanding. First ask yourself, what look are you trying to achieve? You may be wasting time by using the incorrect application techniques.  Too much product can give the face an artificial look. Use a Foundation Brush to use less product, and achieve the best results. 
If you want a more natural look, just use a crème concealer and a light powder. This will give you a “No Makeup” look. Finish with a setting spray. This will freshen your makeup, and feels cool on your face.
  
Concealer $16.50 
 Translucent Powder $21.00+


If you’re looking for more coverage, use a liquid foundation followed by optional concealer (you may not need it. Wait until you put on your liquid foundation then determine if you need additional concealer. Too much can make dark circles and lines more noticeable.), then comes your powder. For additional coverage use a sponge to apply your powder, otherwise you get the best results using a powder brush. You get most of your color/coverage with your liquid foundation. Powder just sets and softens. 
o For full coverage without using a liquid foundation, try a full coverage pressed powder. Apply with a sponge. 

To apply a Liquid Foundation:
o Start by using a Foundation Brush.
o Squirt a pea size amount of product on your brush.
o Make 5 Dots on your face with the product: Forehead, Nose, Chin and Cheeks. 
o Start blending the foundation starting in the center and working your way out.
o If more product is needed, apply as you go. 
o Set with a powder or setting spray.  
                                      

 Anti-Aging Makeup $29.50   


Liquid Powder Foundation $24.95


 Full Coverage Photo Finish Powder $24.50


Step 2:  Contour and Color Cheeks


 First, you want to get to know your face. Feel around with your fingertips for the structure and placement of the bones underneath.  This will help you determine your ‘Highlights’ and ‘Hollows’, and show you where to put your colors. 
Your foundation is your blank slate. Now you need to add depth, definition and color. 
You use a darker shade (bronzer) in the hollows and lighter shade as your highlight (bones).  Blend everything together with a powder brush so you have no definite lines. 

Shape and Sculpt Duo $22.00   


Bronzer/Blush Duo $22.50


When using blush, the best trick is still to suck in your cheeks! Apply the color to the apple of your cheeks, and follow the line your mouth creates sweeping up to your temples. A little color goes a long way! Blush is meant to give you a natural looking flush, so choose a color that will compliment your skins undertones. 

You can’t get around it here…you gotta use a blush brush! Applying blush with a cotton ball or sponge will transfer too much product to one spot, and will not blend easily. Using a Blush Brush gives you the best result. 


 Pressed Blush $14    


Blush Brush $14.95


*Dry Skin? Try using a sheer hydrating foundation (Ageless Renewal $29.50) and crème blush ($18.95). Let dry, then set with 10 Years Younger Spray ($29.95). 


Step 3:   Eyes 

Eye Shadow


When first starting, choose 3 neutral colors (tans, browns, greys, pinks) that will compliment your skin tone and eye color. Then prep your eyelid with a base. The base helps the pigment in the shadow adhere better which creates a bolder color that lasts longer, and prevents from creasing. 

Shade 1 :Your 2nd to lightest color
   Apply on the base of the lid
   Best results when using a Crème Shadow underneath

Shade 2: Your darkest color
   Apply on the crease above your lid, use a “C” shape motion and blend inwards
   Blend 2 shades together with a blending brush to soften

Shade 3: Your lightest color
   Apply lightest color on your brow bone to highlight
   Blend until desired look is achieved


 Eye Base $14.00


Pressed Eye Shadow $12.50     


Eye Liner 
When first starting out, it’s easiest to use a Kohl Eyeliner. This is a pencil, so it’s perfect for if you want to rim your water line, or to create a soft, natural look. Or, if your eyes water, you can use a twist up waterproof pencil for the same look. 

 Kohl Liner $14.75   


Waterproof Pencil $15.00


Use the chart above to help you to apply your eyeliner. Most women mess up by drawing one bold line. This line can come out too thick, uneven and sloppy. By using short strokes, you create a more natural line and can correct any mistakes by smudging, or applying a dark shadow on top. 
Stopping ¾ of the way through helps you to get a more natural look, and opens up the eye. For a more dramatic look, carry the line to the center. 
Practice makes perfect!

Liquid eyeliners, gel eyeliners and pen eyeliners are excellent for getting a cat eye, wing tip or edgy looks. 


Mascara
To apply mascara, first use a primer. This is goes on white and dries clear, so wait for it to dry before continuing. This puts a seal around your natural lashes for mascara to go over and give you the appearance of fuller, longer lashes. 
Next, apply your mascara from the base of your lash line, and wiggle the wand all the way to the tops of your lashes. Repeat this process until desired look is achieved. 
The more coats you apply, the more dramatic your result.

Brows
Your eyebrows frame your eye shape, so they are very important! Most women skip this step, but it makes such an improvement and can take years off your look! You can lift the eye just by some simple brow maintenance. 


Using a pencil, place it first on the side of your nose. This (point A) will tell you where your eyebrow needs to start. Then move the pencil until it lands in the middle of your pupil. This (point B) is where your eyebrow should arch. Lastly, move the pencil to the outer corner of your eye. This (point C) will show you where your eyebrow needs to end.
Use an eyebrow brush to shape the brow. Brush up to the arch, then down. 
Use an eyebrow pencil or powder to fill in eyebrows and make them look fuller and shaped. 
Don’t be heavy handed! Use light strokes to fill in holes, define shape, and extend the tail. 

 Eyebrow Pencil $14.00    


Eyebrow Kit $29.95


Step 4:   Lips 


Lips that are in good condition can wear almost any shade of lip color, as long as you follow undertones complimentary to your skin tone. 
Keep lips healthy by exfoliating with lip pumice, and moisturizing with lip treatment.

First thing you want to put on is your lip liner. I guarantee most of you do not wear a lip liner when you should be.

The benefits of using Lip Liner:
o Makes your lipstick last longer.
o Makes lip color more vibrant.
o Helps to prevent your lipstick from bleeding.
o Can change shape of your lips, making them appear fuller or thinner. 
o Gives shape to lips if only wearing a gloss.
o Same concept as wearing a base under your eye shadow, colors appear more vibrant and last hours longer!


When applying lip liner, use the Dot-Dot-Dash technique. This is where you place dots and dashes with you lip liner on your lips, and then connect the dots to complete the liner. This makes it easier to follow your natural lip shape, and to achieve the look you desire. 

*For Fuller lips, make short, rounded strokes. For thinner lips, make straight lines. 

Apply your lipstick / lip-gloss after your lip liner using a Lip Brush.  Blot with a tissue to remove excess product. 

  Lip Crayon $14.75   


Lipsticks $14.95+   


Lip Shine $10.50


Interested in any of the products above? CLICK HERE to buy the 
Motives makeup mentioned.