Wednesday, December 12, 2012

The Basic Face


Last weekend, I hosted a Make-Up Class at J'adore Fason Salon in Cary NC called The Basic Face. This class taught women the 4 Steps to Completing a Face, using Motives Cosmetics.


I had never taught a class before, just usually worked one on one with clients giving them advice and help with their makeup application. So this was a new thing for me and I was excited to take on the challenge!
I am pleased to say that the class was a success! We had about 15 guests show up, and a lot of people were interested in booking an appointment, and said they learned a lot of information!


I decided that since you couldn't make it, I would share with you some of the notes I handed out during the class.
Enjoy!


            THE BASIC FACE
           4 Steps to Completing a Face
Step 1:   Prep, Prime and Base

Prep: Prepping the skin prior to makeup application isn’t just nice to do, it’s a requirement. Your makeup can only look as good as the skin underneath!  Be sure to wash your face twice daily. Washing your face includes 4 steps- Cleanse, Tone, Treat, and Moisturize.  It is important to remove your makeup every night before going to sleep, and every morning before you reapply your makeup. 

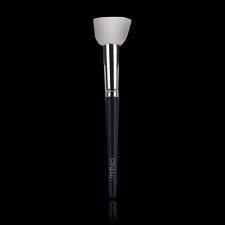
Prime: Using a primer is something that most women don’t use when they should be! A primer acts as a barrier between your skin and your foundation, creating a long-lasting natural look. The primer fills in fine lines, wrinkles, large pores, and uneven skin textures. This creates a smooth canvas for makeup to go over.  A little goes a long way! Use a foundation brush to apply. 
                   
  Motives Perfecting Face Primer $19.95


Base:  This step is what most women have difficulty understanding. First ask yourself, what look are you trying to achieve? You may be wasting time by using the incorrect application techniques.  Too much product can give the face an artificial look. Use a Foundation Brush to use less product, and achieve the best results. 
If you want a more natural look, just use a crème concealer and a light powder. This will give you a “No Makeup” look. Finish with a setting spray. This will freshen your makeup, and feels cool on your face.
  
Concealer $16.50 
 Translucent Powder $21.00+


If you’re looking for more coverage, use a liquid foundation followed by optional concealer (you may not need it. Wait until you put on your liquid foundation then determine if you need additional concealer. Too much can make dark circles and lines more noticeable.), then comes your powder. For additional coverage use a sponge to apply your powder, otherwise you get the best results using a powder brush. You get most of your color/coverage with your liquid foundation. Powder just sets and softens. 
o For full coverage without using a liquid foundation, try a full coverage pressed powder. Apply with a sponge. 

To apply a Liquid Foundation:
o Start by using a Foundation Brush.
o Squirt a pea size amount of product on your brush.
o Make 5 Dots on your face with the product: Forehead, Nose, Chin and Cheeks. 
o Start blending the foundation starting in the center and working your way out.
o If more product is needed, apply as you go. 
o Set with a powder or setting spray.  
                                      

 Anti-Aging Makeup $29.50   


Liquid Powder Foundation $24.95


 Full Coverage Photo Finish Powder $24.50


Step 2:  Contour and Color Cheeks


 First, you want to get to know your face. Feel around with your fingertips for the structure and placement of the bones underneath.  This will help you determine your ‘Highlights’ and ‘Hollows’, and show you where to put your colors. 
Your foundation is your blank slate. Now you need to add depth, definition and color. 
You use a darker shade (bronzer) in the hollows and lighter shade as your highlight (bones).  Blend everything together with a powder brush so you have no definite lines. 

Shape and Sculpt Duo $22.00   


Bronzer/Blush Duo $22.50


When using blush, the best trick is still to suck in your cheeks! Apply the color to the apple of your cheeks, and follow the line your mouth creates sweeping up to your temples. A little color goes a long way! Blush is meant to give you a natural looking flush, so choose a color that will compliment your skins undertones. 

You can’t get around it here…you gotta use a blush brush! Applying blush with a cotton ball or sponge will transfer too much product to one spot, and will not blend easily. Using a Blush Brush gives you the best result. 


 Pressed Blush $14    


Blush Brush $14.95


*Dry Skin? Try using a sheer hydrating foundation (Ageless Renewal $29.50) and crème blush ($18.95). Let dry, then set with 10 Years Younger Spray ($29.95). 


Step 3:   Eyes 

Eye Shadow


When first starting, choose 3 neutral colors (tans, browns, greys, pinks) that will compliment your skin tone and eye color. Then prep your eyelid with a base. The base helps the pigment in the shadow adhere better which creates a bolder color that lasts longer, and prevents from creasing. 

Shade 1 :Your 2nd to lightest color
   Apply on the base of the lid
   Best results when using a Crème Shadow underneath

Shade 2: Your darkest color
   Apply on the crease above your lid, use a “C” shape motion and blend inwards
   Blend 2 shades together with a blending brush to soften

Shade 3: Your lightest color
   Apply lightest color on your brow bone to highlight
   Blend until desired look is achieved


 Eye Base $14.00


Pressed Eye Shadow $12.50     


Eye Liner 
When first starting out, it’s easiest to use a Kohl Eyeliner. This is a pencil, so it’s perfect for if you want to rim your water line, or to create a soft, natural look. Or, if your eyes water, you can use a twist up waterproof pencil for the same look. 

 Kohl Liner $14.75   


Waterproof Pencil $15.00


Use the chart above to help you to apply your eyeliner. Most women mess up by drawing one bold line. This line can come out too thick, uneven and sloppy. By using short strokes, you create a more natural line and can correct any mistakes by smudging, or applying a dark shadow on top. 
Stopping ¾ of the way through helps you to get a more natural look, and opens up the eye. For a more dramatic look, carry the line to the center. 
Practice makes perfect!

Liquid eyeliners, gel eyeliners and pen eyeliners are excellent for getting a cat eye, wing tip or edgy looks. 


Mascara
To apply mascara, first use a primer. This is goes on white and dries clear, so wait for it to dry before continuing. This puts a seal around your natural lashes for mascara to go over and give you the appearance of fuller, longer lashes. 
Next, apply your mascara from the base of your lash line, and wiggle the wand all the way to the tops of your lashes. Repeat this process until desired look is achieved. 
The more coats you apply, the more dramatic your result.

Brows
Your eyebrows frame your eye shape, so they are very important! Most women skip this step, but it makes such an improvement and can take years off your look! You can lift the eye just by some simple brow maintenance. 


Using a pencil, place it first on the side of your nose. This (point A) will tell you where your eyebrow needs to start. Then move the pencil until it lands in the middle of your pupil. This (point B) is where your eyebrow should arch. Lastly, move the pencil to the outer corner of your eye. This (point C) will show you where your eyebrow needs to end.
Use an eyebrow brush to shape the brow. Brush up to the arch, then down. 
Use an eyebrow pencil or powder to fill in eyebrows and make them look fuller and shaped. 
Don’t be heavy handed! Use light strokes to fill in holes, define shape, and extend the tail. 

 Eyebrow Pencil $14.00    


Eyebrow Kit $29.95


Step 4:   Lips 


Lips that are in good condition can wear almost any shade of lip color, as long as you follow undertones complimentary to your skin tone. 
Keep lips healthy by exfoliating with lip pumice, and moisturizing with lip treatment.

First thing you want to put on is your lip liner. I guarantee most of you do not wear a lip liner when you should be.

The benefits of using Lip Liner:
o Makes your lipstick last longer.
o Makes lip color more vibrant.
o Helps to prevent your lipstick from bleeding.
o Can change shape of your lips, making them appear fuller or thinner. 
o Gives shape to lips if only wearing a gloss.
o Same concept as wearing a base under your eye shadow, colors appear more vibrant and last hours longer!


When applying lip liner, use the Dot-Dot-Dash technique. This is where you place dots and dashes with you lip liner on your lips, and then connect the dots to complete the liner. This makes it easier to follow your natural lip shape, and to achieve the look you desire. 

*For Fuller lips, make short, rounded strokes. For thinner lips, make straight lines. 

Apply your lipstick / lip-gloss after your lip liner using a Lip Brush.  Blot with a tissue to remove excess product. 

  Lip Crayon $14.75   


Lipsticks $14.95+   


Lip Shine $10.50


Interested in any of the products above? CLICK HERE to buy the 
Motives makeup mentioned. 

Monday, November 5, 2012

Your Make-Up Only Looks as Good as the Skin Underneath


While working for Clinique, one of the things we learned in our Skin Care class was:

    "Your Makeup only looks as good as the skin underneath."

So often us women use makeup to cover up all our flaws. I know this because I am guilty of it. We use concealer to cover dark circles under our eyes, pimples, and blemishes on our face. Then we use Foundation to cover everything up and even everything out. Then we use a powder over top to get even MORE coverage, and by that time your skin is completely covered up with make up. We're using our makeup to hide what we aren't happy with instead of trying to fix the problem we don't like.

Skin care should be an extremely important part of your daily routine. In my experience  most people don't take proper care of their skin, and the reason is usually because they simply don't know how! Before I went to Aveda, and had training from Clinique, I didn't know how to take care of my skin either. In result, I had pretty bad acne and am still working on cleaning up the mess it made. I thought that I could simply use makeup remover wipes, and that was it! How wrong I was!


There are 3 Basic Steps you should follow twice every day for healthy skin:

1) Cleanse:  When you wake up every morning, and before you go to bed every night, you need to wash your face! Cleansing removes dirt, oil, makeup and pollutants from the skin. Cleansers also gently exfoliate dead skin cells from the surface of the skin. This helps to keep your pores clear of residue therefor preventing breakouts, and helps to reveal and maintain youthful looking skin. 

                        *Try Cellular Laboratories De-Aging Facial Cleanser!   $36.75   Buy Here!

2) Tone:  Toning is a very important step that most people skip. Using a toner restores the skins natural pH Balance and removes any residue that the cleanser missed, or left behind. This also helps your moisturizer to soak into the skin better, and promotes circulation. Use your toner with a cotton ball, and sweep across your forehead  down your nose, then across your cheeks and chin. 

*Try Cellular Laboratories De-Aging Toner!    $52.50   Buy Here!


3) Moisturize: Lastly, you need to moisturize your skin, especially in the fall/winter season. Moisturizing helps restore your skins natural moisture barrier, keeping your skin health and elastic. Dry skin ages more quickly then hydrated skin. Moisturizers soften, protect, brighten and hydrate the skin. When you cleanse and tone, you are stripping the skin of natural oils causing it to become dry and tight. Moisturizing brings your skin back to its natural state. Its also a good idea to get a moisturizer with SPF in it. UV damage is so harmful to our skin, it damages free radicals causing us to age quicker. To prevent sun damage, use an SPF daily! 

*Try Cellular Laboratories De-Aging Moisturizer with SPF 55!    $42.00    Buy Here!


It seems like alot of work to cleanse, tone and moisturize two times a day, but I promise you it will only take you about 3-5 minutes, and you will notice such an improvement in your skin! You will also notice your makeup looking better too! 

If you have pretty normal skin, then the 3 basic steps are all you need to worry about. For those of us who have some problem areas we are concerned with....we continue on to Step 4. 

4) Treat: Treatments include serums and spot treatments to target specific needs of the skin. These items give your anti-aging regimen a boost as they work deep within the layers on skin to reverse signs of aging and other skincare needs. Treatment items are layered after your moisturizer, and penetrate deep in the skin to repair. Treatment items can be used for aging, wrinkles, loss of elasticity, acne, marks and discoloration, and dryness. 

Here are some treatment items offered in the Cellular Laboratories Line!


De-Aging Creme
Anti Wrinkle and Brightening Complex
$94.50


De-Aging Eye Creme
$62.95


Timeless Prescription
Anti-Blemish Lotion
$20.95


Struggling with Acne? Try this 3 Step System:


$73.50


I hope you start paying more attention to the care you are giving your skin. We spend so much money trying to fix problems once they happen, when we aren't trying to prevent them from happening at all! Whether you use the Cellular Laboratories brand or not, you still need to be doing these 3 simple steps two times daily! And whatever you do, please do NOT go to sleep with your makeup on, or apply new makeup over old makeup. Besides not wearing an SPF, that's the worst thing you can do to your skin! 

Once you have your skin in good condition, you will notice your makeup going on smoother, and you may be using even less makeup! And, you will slow down the aging process!! Who doesn't want to do that! Its never to late to start taking care of your skin! Your face is the first thing people notice, so make a good impression!

Monday, October 29, 2012

Basics of Make-Up Brushes


When working with clients and teaching them about proper makeup application, I usually start with explaining the importance of using brushes when putting on their makeup. Most people don't typically use brushes, and don't know why they should. So I am going to go through the type of makeup brushes that are available, what they are for and why they are important. I know that it seems like an expensive investment when your used to using your fingers, or the sponge that comes with your compact, but I promise you once you start applying your makeup with the proper brushes, you will definitely see a difference and won't ever go back to using your fingers!


The most important brush you should use is a Foundation Brush.
                                                      $17.50    Buy Here!
A Foundation Brush is used to apply liquid foundation. Most people use their fingers, or a sponge for their foundation, and that is the worst thing you can do! Unless you have extremely clean hands, using your fingers is going to spread dirt and bacteria around your face, get into your pores, and make you break out. Its also hard to get a smooth finish using your fingers, so you end up having streaks on your face, or spots that end up thicker then other spots leaving you looking blotchy. Using a sponge is another bad idea. A sponge absorbs liquids, which means that it will also absorb product. About 50% of your foundation is going to end up inside of your sponge rather than on your face where you need it. This means you end up using way more product then you need to and you will run out of your product faster. This is good for those of us who are making money off of you buying foundation more often, but not good for those who are buying the foundation!  The best way to put on your foundation is with a Brush. The soft and tightly packed bristles offer you a smooth, flawless finish with the end result looking fantastic! You wont be spreading bacteria into your pores, and your not wasting any product. Just make sure you wipe the brush with a makeup remover wipe, or spray with a brush cleaner after each use.

Prevent Settling with a Jumbo Sponge Brush!
                                                      $11.00  Buy Here!
Ever notice that as the day goes on, your liquid foundation settles into your lines and wrinkles? Now you can prevent that by blotting away excess product with the sponge brush. After you apply your liquid foundation, let it sit for about 1-3 mins, then use the flat surface of the sponge to blot away excess product in problem areas (around mouth, eyes, frown lines, etc.). Do this before applying your powder, and you wont have settling in your wrinkles.


Next, you need a Powder Brush.
$14.95  Buy Here!
A powder brushed can be used to apply loose or pressed powder foundation. Now a sponge can be used for powder (its not going to absorb product like it does for liquid foundation), but a brush gives you a more airbrushed look. A lot of people think that they can get more coverage by using a sponge. While it is true that a sponge can give you good coverage, a brush can give you the same amount of coverage with a better end result. The trick is where you hold the brush, and how much product you put on the brush. Swirl your brush in your powder compact, tap two times on your finger to get rid off excess product (this prevents you from getting powder all over your clothes) and then press the brush onto your face making circular patterns. Holding the brush tightly at the base will give you more coverage and thicker application, while holding the brush loosely in the middle will give you lighter effect. 

A definite must have is the Kabuki Brush!
                                                          $13.95  Buy Here!
If you can only afford to get one makeup brush, this is the one to start your collection! A Kabuki brush has a variety of uses. You can use this to blend your makeup, apply powder, use for bronzer, blush, fixes mistakes (too much blush) and the list goes on and on! The short handle and tightly bound bristles makes for a great deposit of pigment, and distribution of product. I guarantee you will use this everyday, and for multiple purposes.

Of course everyone needs to have a Blush Brush.
                                                          $10.95  Buy Here!
There is no way getting around this one. To wear blush, you must have a blush brush. This brush is smaller than the powder brush and angled to give you the perfect blush application every time. If the blush brush you are currently using is not angled, you should get one that is. All you need to do is swirl the brush in the blush compact, suck in your cheeks, line the bottom of the brush up with the top of the line that your cheeks create, and apply the blush creating a path to the top of your ear. Make sure you don't apply too much! Just enough to give you a natural glow.

For the perfect eye-shadow, use Eye Shadow Brushes.
                                         Blender Brush      $9.95       Buy Here!
                                                    Detailing Brush   $9.95   Buy Here!
                                                       Liner Brush  $14.00  Buy Here!
It makes life so much easier when you apply your eye-shadow with brushes. Using the applicators that come in your eye-shadow compact are perfect for applying the base color on your lid, but typically we put 3 to 5 colors on the eye, so how are you supposed to do that and make it look pretty with a foam applicator? If you want precision, definition, contrast, blending, and clarity.....you need to use brushes! Use an eye-shadow brush (or the foam applicator) to apply the base color (lightest color) on your lid, then use the detailing brush and make a "C" pattern on your crease using the 2nd darkest color, wet the end of the liner brush and use it to apply the darkest color along your lash line. Then smooth the edges and blend it all together with the blending brush. I will talk about more advanced eye-shadow techniques in future blog posts, but that is the basic application technique. And remember, practice makes perfect!

Make your tube of lipstick last longer by using a Lip Brush.
                                                        $9.95   Buy Here!
How many times have you applied your lipstick from the tube, then used a tissue to blot away the excess? When you do that you are simply wasting precious product. We tend to be heavy handed when we put on our lipstick and press down too hard on the tube. In result, we get a lipstick bullet that's hollowed out in the middle and tends to take on the shape of our lips. Instead, use a lip brush and wipe it across the bullet of your lipstick and apply it to your lips that way. In result, you end up getting a better look and you don't have to blot! Your saving product and not wasting tissue!


It's hard to get all the makeup brushes you need at one time since it can become so costly. I recommend starting out with one or two brushes that you think you would use the most (foundation brush and kabuki brush are two good ones to start with), then buy the rest slowly until you have everything you need. I still don't have all the brushes that I need! Just try to buy one a month, and once you have them all, they will last you forever! As long as you buy good quality brushes (like these). Its so tempting to buy cheap brushes, I know because I have done it! Trust me, you get what you pay for. Cheap brushes generally have fewer bristles which means you don't get the same coverage or application. Ever use a cheap eye-shadow brush and you cant even see the color you put on? Its because there aren't enough bristles in the brush, and the bristles that they have are bound together with cheap glue- which results with you having bristles all over your face! Cheap Products = Cheap Quality.

Another solution I recommend is getting a Starter Kit.
7 Piece Starter Brush Set     $35.00    Buy Here!
15 Piece Pro Brush Set      $105.00    Buy Here!

By buying brushes in a set, you are getting them at a cheaper cost then you would by buying them individually, and it gives you a head start to your collection.

After you get all your makeup brushes, you want to maintain your investment by taking proper care of them. You can make your own brush cleaner at home for free, and preserve the life of your brushes. Get a small spray bottle from the dollar store and add about a tablespoon of your face wash (this way you know the soap your using wont make you break out). Fill the rest of the bottle with water and shake, shake, shake! After your done using your brushes, spray a face cloth with your homemade (or you can buy some if you prefer) brush cleaner, and wipe the brush in the wet area until your brush looks clean. Do not spray your brush directly with the cleaner! The moisture can loosen the bonds and cause your bristles to fall out. 

I hope all these tips on Make-Up Brushes was helpful, and good luck on starting your own brush collection! I promise you once you start using brushes to apply your makeup, you'll never go back to your fingers or sponges again!


Saturday, October 27, 2012

Make-Up With The Kardashians

Most people that know me know that one of my guilty pleasures is watching bad reality TV shows like Teen Mom, Jersey Shore, and especially Keeping Up with the Kardashians! I can't help it, I know it's terrible but it's so addicting! And the worst part is I feel like I've developed relationships with these people. Sad, I know. Thank goodness these shows usually come on at 10 pm so that my husband is usually asleep already and doesn't have to suffer through them.

Being a Make-Up artist, I can't help but admire how good the Kardashians makeup always looks! I mean I know they are just beautiful girls in general, but they always look so flawless! They are few of the lucky people that happen to have a personal Make-Up artist on hand! Don't we all wish we had that privilege? I always have wondered, what line of makeup does Kim's makeup artist use? Surely it's an expensive, high end makeup line that none of us regular folks can afford. Surely.


Friday, I had my first class with Motives Cosmetics. It was amazing! I learned so much about the products and the company; it makes me proud to be a part of such an amazing team, and excited to start my journey as a Motives Makeup Artist! This makeup line is definitely a professional high quality makeup, with such an affordable price! I mean $24.95 for a full coverage foundation is an amazing price for the quality. You'd expect something this awesome to be like $40-$50 at least! I know I'm paying $40 right now for my Estée Lauder foundation!

One thing I learned that I was really excited about (but probably shouldn't have been AS excited as I was) is that the Kardashians makeup artist is a Motives Pro-Artist! So it seems I am using the same brand of Make Up that is used on the beautiful and famous Kardashian sisters! And it's super affordable! Yup, this is the right choice for me!


Kim wearing Photo Finish Powder $24.50
Buy Here!


Kim with Loren Ridinger, Founder of Motives Cosmetics

Since the powder looked so good on Kim, I decided to try it out for myself, and I love it! I have
pretty bad acne scars, and it covered all my blemishes, evened out my skintone, and didn't leave my skin feeling dry or cakey like most full coverage powder foundations do. I applied the product with a Powder Foundation Brush for a softer look, but you could also use a sponge for application to get more coverage. This would look awesome over top of a liquid foundation, or worn alone if your in a rush, in the car, or simply don't like to mess with a liquid foundation.

Another awesome thing about this powder is that it shows up beautifully in pictures! Dont you hate when you take a picture with your girlfriends and your face turns out white? This wont happen with the Photo Finish Powder! I am in love, and I bet you would be too! I took this picture of my makeup with my iPad, so its not very clear, but you can still tell that my skin looks flawless and you would never be able to tell that I had so many scars hidden underneath. What do you think?


I can't wait to experiment more with the Make-Up that is offered in this line, and as I play with it and learn more about it, I will post tricks and techniques and How-To's so you can master the art of makeup yourself!
Thanks for reading!